
Tracking revenue from your e-commerce store
Revenue tracking lets Pathmonk measure the real value of every purchase and attribute it to the correct visitor journey — so your reports show actual revenue, not estimates, and the AI optimizes for what genuinely earns the most. This is the recommended setup for every e-commerce store.
There are two paths: a guided integration for Shopify, and a tracking pixel for any other platform.
Shopify
Step 1: Confirm e-commerce mode in your snippet
The standard Pathmonk snippet already includes the e-commerce functionality by default if you choose Shopify. Review the snippet to make sure the attribute eshop="on" is there, it belongs with the other setAttribute lines:
html
<!-- Loading Pathmonk web SDK for JavaScript -->
<script async type="text/javascript">
(function(d,key) {
    var js, si = 'pathmonk-js-sdk'; var dv, vi = 'pathmonk-root';
    if (d.getElementById(si)) return; if (d.getElementById(vi)) return;
    dv = d.createElement('div'); dv.id = vi;
    dv.style.cssText = "display:none";
    dv.setAttribute("setup", "page_plugin");
    dv.setAttribute("eshop", "on");
    dv.setAttribute("client_id", key);
    d.body.appendChild(dv);
    js = d.createElement('script'); js.id = si;
    js.src = 'https://pathmonk-lib.pathmonk.com/plugin/plugin.min.js';
    d.body.appendChild(js);
}(document, "YOUR_CLIENT_KEY_HERE"));
</script>
Step 2: Install the Pathmonk Shopify app
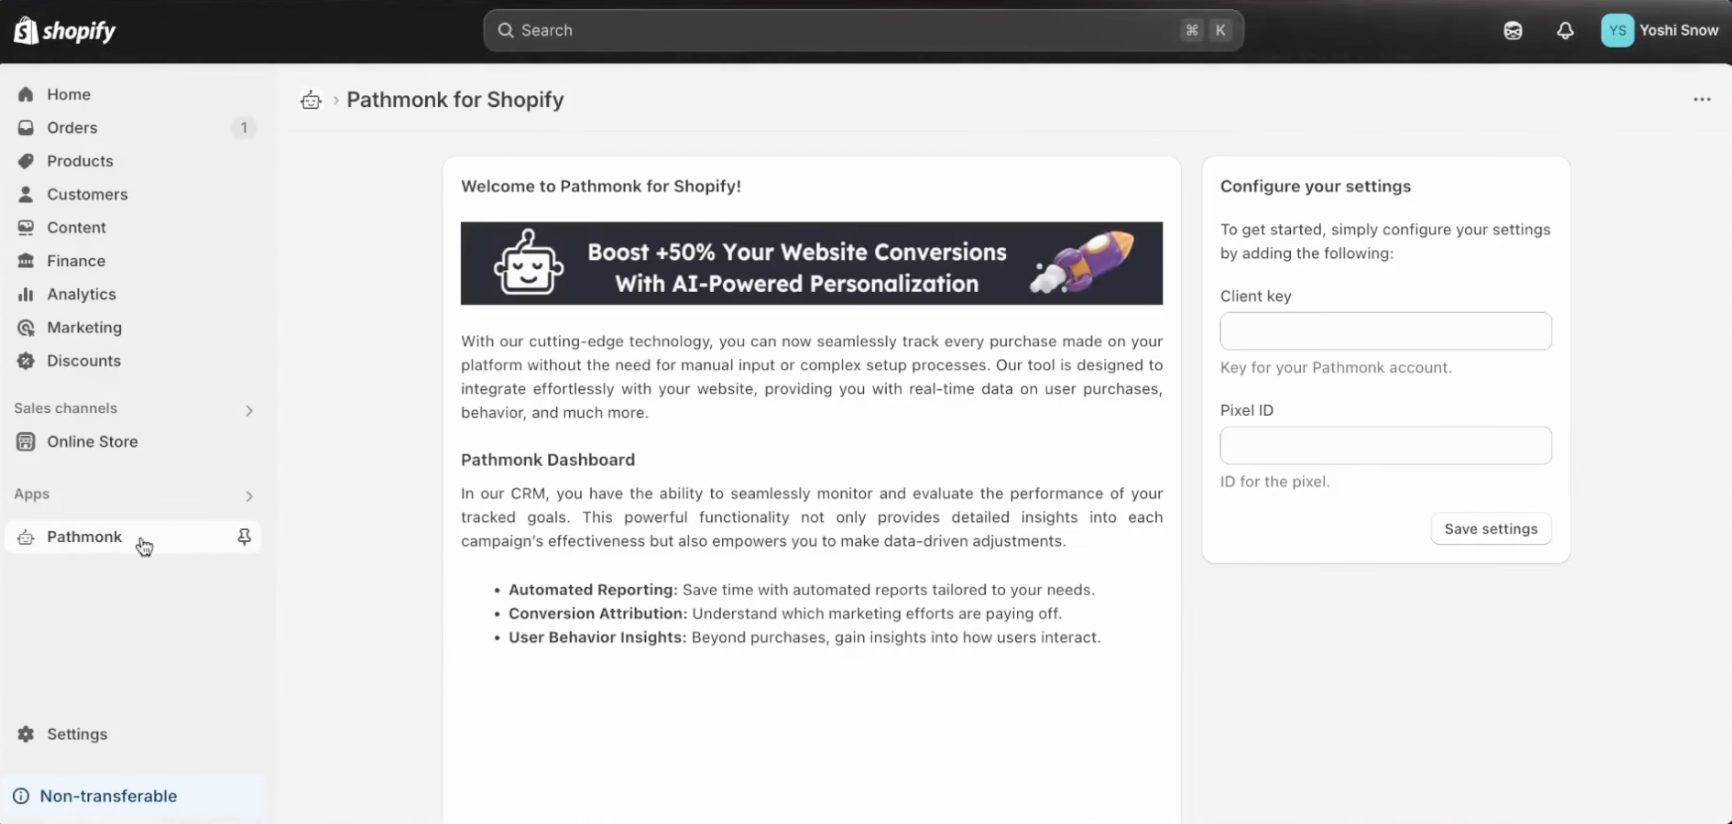
Install the official app from the Shopify App Store: apps.shopify.com/pathmonk. Its dashboard appears once installed.
Step 3: Create a page load pixel
In Pathmonk, go to AI Engine → Event tracking (crm.pathmonk.com/dashboard/goals?tab=list), click + Add Event, and select Page Pixel. Name the conversion (e.g. "Sale") and leave the monetary value blank — Pathmonk extracts the real purchase amount from each order automatically.
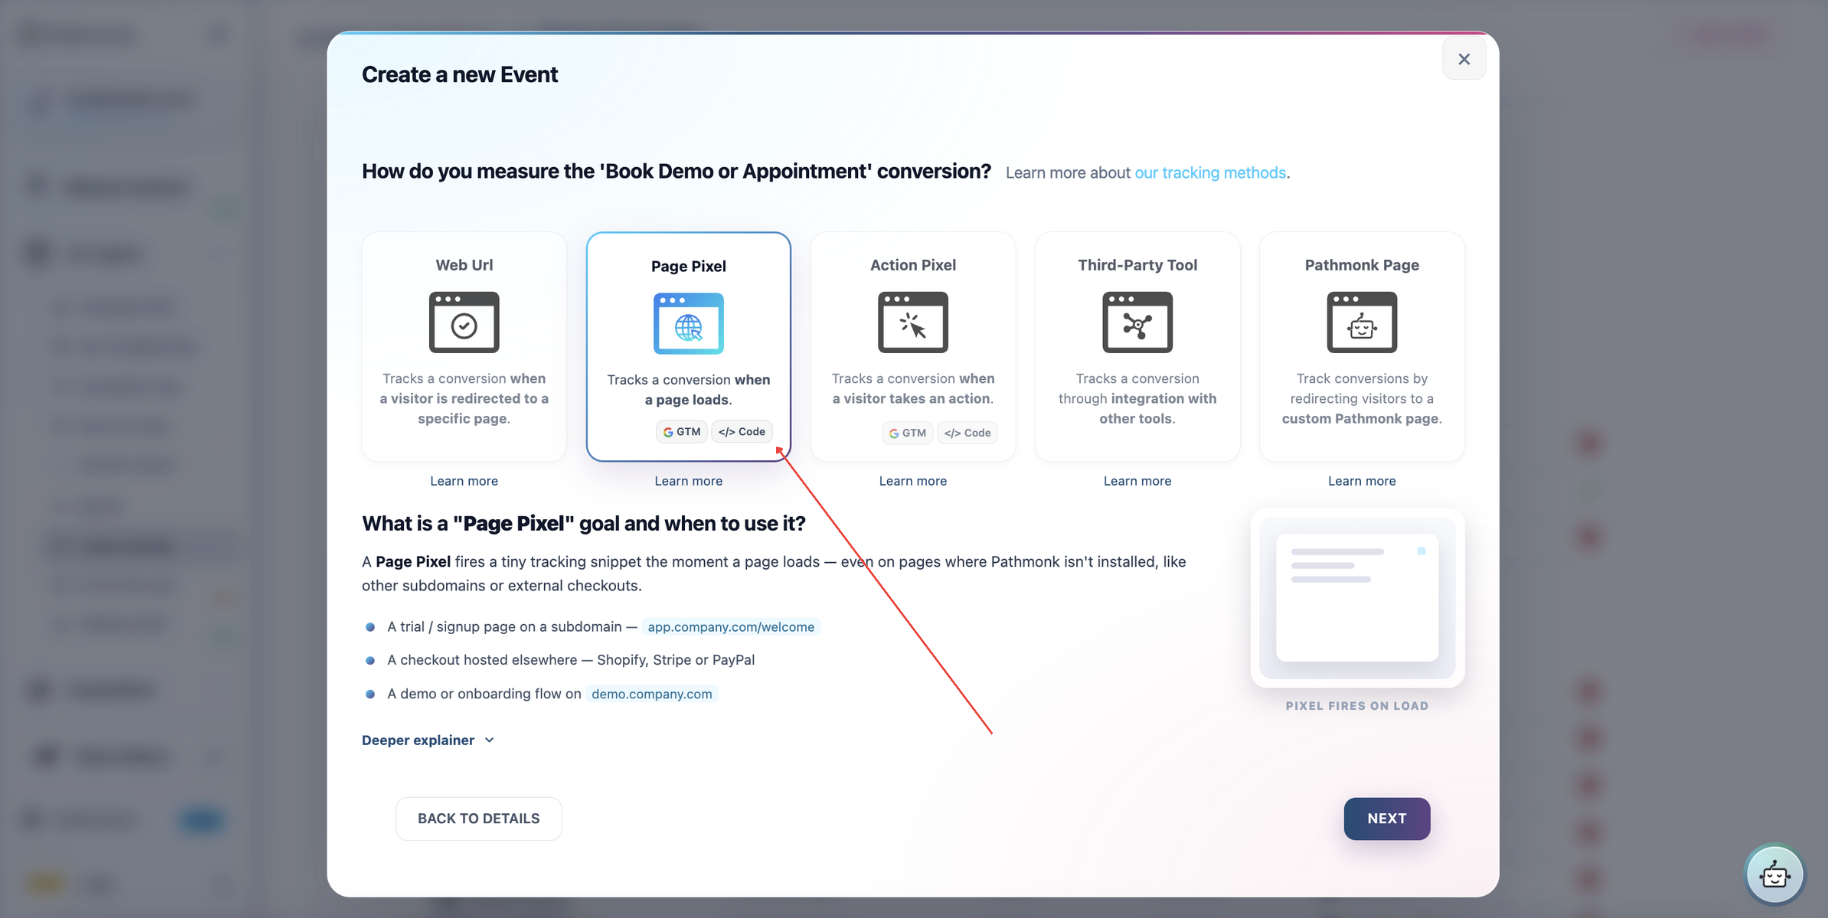
Once you click on Next, the system will generate a tracking script similar to the example below:
html
<!-- Pathmonk Tracking Code --><script type="text/javascript"> (function(d,key,id) { var js; js = d.createElement('script');js.src = 'https://pathmonk-lib.pathmonk.com/plugin/track.min.js?client_id='+key+"&pixel_id="+id+"&new=off";d.body.appendChild(js); }(document, "kXS9qKXu4fAO0vIZYT6cfxlZa", "02aee631-22ff-47b0-91f7-d527ef109c36"));</script>
In this example:
kXS9qKXu4fAO0vIZYT6cfxlZa= Client key02aee631-22ff-47b0-91f7-d527ef109c36= Pixel ID
Step 4: Connect the Shopify app
Back in the Pathmonk Shopify app, paste the client key and pixel ID into their fields and save. This links Shopify's order data to your Pathmonk account.
Step 5: Test
Run a test purchase using Shopify's test mode, then check that the conversion appears in your Pathmonk dashboard with the correct revenue value.
Troubleshooting: most Shopify issues come down to mismatched credentials (client key or pixel ID) or the snippet missing the
eshop="on"attribute.
Other e-commerce platforms
Step 1: Create a page pixel
In AI Engine → Event tracking, click + Add Event and choose Page Load Pixel. Add a name for your conversion (for example, "Sale") and leave the monetary value blank — Pathmonk will automatically pull the revenue data from each purchase.
Once you click Next, the system will generate a tracking script similar to the example below:
html
<!-- Pathmonk Tracking Code -->
<script type="text/javascript">
    (function(d,key,id) {
        var js; js = d.createElement('script');js.src = 'https://pathmonk-lib.pathmonk.com/plugin/track.min.js?client_id='+key+"&pixel_id="+id+"&new=off";d.body.appendChild(js);
    }(document, "kXS9qKXu4fAO0vIZYT6cfxlZa", "02aee631-22ff-47b0-91f7-d527ef109c36"));
</script>
In this example:
kXS9qKXu4fAO0vIZYT6cfxlZa= Client key02aee631-22ff-47b0-91f7-d527ef109c36= Pixel ID
Keep these values handy for the next step.
Step 2: Update the script
Using this script below as a template:
html
<script>
function pathmonkConversionPixelPrice(price) {
    d = document;
    key = "CLIENT_KEY";
    id = "PIXEL_ID";
    var js;
    js = d.createElement('script');
    js.src = 'https://pathmonk-lib.pathmonk.com/plugin/e-track.min.js?client_id=' + key + "&pixel_id=" + id + "&new=off&price=" + price;
    d.body.appendChild(js);
}; pathmonkConversionPixelPrice(ACTUAL_PRICE);
</script>
replace the CLIENT_KEY and PIXEL_ID placeholders with the values you got from the previous step.
You also need to call the function with the real purchase amount or the variable you use to identify your revenue. To do so, replace ACTUAL_PRICE with:
- the variable containing the real transaction price (e.g.
order.totalPrice), or - a fixed number (e.g.
49.99) for testing.
You'll find this variable in your Google Tag Manager or the data layer used to retrieve revenue. Make sure the function is called after payment confirmation, so Pathmonk tracks the correct purchase value.
Example
Here's what a working setup might look like:
html
<script>
function pathmonkConversionPixelPrice(price) {
    d = document;
    key = "abc123client";
    id = "pixel789xyz";
    var js;
    js = d.createElement('script');
    js.src = 'https://pathmonk-lib.pathmonk.com/plugin/e-track.min.js?client_id=' + key + "&pixel_id=" + id + "&new=off&price=" + price;
    d.body.appendChild(js);
}; pathmonkConversionPixelPrice(order.price);
</script>
This sends a conversion event with the price in the variable order.price to your Pathmonk account.
⚙️ Troubleshooting
- The price doesn't show up: make sure you're calling the function after the purchase event, when the actual price value is available.
- Nothing happens: open your browser console (F12) and check for JavaScript errors.
Still not tracking? Contact support@pathmonk.com with your pixel's ID and a link to the page.
With either setup, revenue flows into your reports automatically and each sale is attributed to the journey that produced it. See Assigning a monetary value to your conversions for how non-revenue goals fit into the same picture.